There Is No Spoon…

So, attempting to set up a virtual machine on Ubuntu now leaves me some choices (again, which is mostly a good thing).

Attempting to set up a secure Windows environment is never easy. Maybe one of the better/best ways to do this is to simply use VMs and virtualised software…

First, I need virtualisation host software. VMware ESXi and any other hypervisors are out of the question, because we already have an OS. Besides, despite being comfortable with ESXi (and also have somewhat generous “limits” on their “free” version from v5.5 and up), ESXi is pretty strict in terms of supported hardware.

Having looked at some of the “popular” ones out there, including Oracle’s VirtualBox, Citrix’s Xen, and Red Hat’s KVM (not to be confused with the common abbreviation KVM), I finally decided on KVM.

Even with VirtualBox’s ability to use “integrated mode“, I still believe that having low-level integration with the kernel and open source is more important than reliance on a specific kernel version (note: linked search only shows results from past year to show “current” reported issues as at time of search).

Continue reading

Sidetracked!

So, I saw that there were some updates, and proceeded to do everything from the shell:

apt-get update
apt-get upgrade
apt-get autoremove

Happy that everything “just works” (so far), I confidently restarted the machine… Only to find I could not SSH back into, ping, or otherwise see my server…

Using the console (i.e. locally attached KVM), I found out I was now a “victim” of this. Although the errors were different, the “fix” was the same:

dpkg --configure -a
apt-get dist-upgrade
apt-get -f install
apt-get update

As per the post linked to above, YMMV.

My Name Is Bond… eno1 and enp3s0 Bond…

With two NICs available on my motherboard (one Intel I217V and one Atheros AR8161B), whereas the product specifications warns that “teaming is not supported”, I am aware that any capable network stack would be able to handle teaming via software (disregarding drivers and assuming certain hardware acceleration features like TCP offloading is disabled).

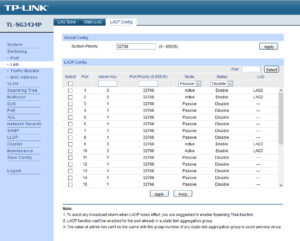
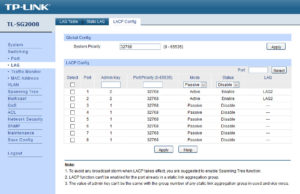
Of course, proper LACP/802.13ad (bonding mode #4) set up requires upstream networking equipment support (i.e. your network switch also requires such support). Fortunately, I happen to have a TP-Link TL-SG3424P managed switch which does support this. Obviously, this is overkill, but I highly recommend the TP-Link TL-SG2008 if 8 ports are sufficient. As I had the chance to run multiple Cat6 cable runs from the closet/store to the various rooms in my apartment when it was renovated, I could, and do, use a SG2008s as a trunk port in my study which is link-aggregated to the SG3424P.

Network Manager

Some instructions on the big, bad Internet mentioned using the Network Manager from the desktop. All that did was to mess up the settings.

Fortunately, I had backups of the /etc/network/interfaces file which I could revert the damage the Network Manager did. So, I finally did the sane thing and just disabled the Network Manager:

If You Want Something Done Right, You Have To Do It Yourself…

So, we come back to the good ol’ shell…

Continue reading

Sharing The Love…

So, the ZFS datasets have been created, and we now have to start creating the shares…

<rant>No thanks to Micro$oft, NFS support on is now only available on Enterprise versions of Windows 10, and therefore I will cannot use (the more efficient) NFS in my largely Windows environment network.</rant>

Goals

My goal was to:

  1. set up several different shares, mapping directly to the ZFS datasets
    1. this meant setting up SAMBA in a “WORKGROUP” environment
  2. allow different users to map this share on Windows, and be able to view only, or modify any objects within (add/delete/edit) according to their permissions per share

What follows is the steps required to:

  • create the SAMBA share(s) and securing it (or at least setting the correct permissions)
  • set-up the SAMBA user(s)

Note: There is a difference between Linux uid/user and gid/group and SAMBA SID/user and GID/group; within this context, I attempt to refer to the latter as “SMB User” and “SMB group” for disambiguation.

Continue reading

RAIDZ2… Finally

Finally, we start installing the ZFS packages and start the RAIDZ2 set-up (no screenshot):

apt-get zfsutils-linux

For several reasons, I chose to use:

  • vdevs created “by-id”:
    • as per advice from multiple places online, using the “easier” /dev/sdx identifier may break things should the order be changed (e.g. you swapped cable ends or drive cages, etc.)
  • lz4 compression
    • as per statistics from some places, the “cost” of LZ4 is relatively low/negligible

Continue reading

Reading Up On ZFS…

Attempting to implement ZFS and the decisions that go into it is enough to make any newbie give up (and/or get terribly confused)…

Unfortunately, Google does not help, what with old information (e.g. installation instructions: old vs. new; possibly outdated information) and different “package variations” of ZFS (e.g. Ubuntu-native ZFS packages vs. ZFS-native), and the endless arguments on the “correct number of disks” for RAIDZ/2 (mirrored vdevs only? RAIDZ? RAIDZ2? mirrored RAIDZ/2? block size?)…

I read through all those articles linked above, including some other helpful(?) ones:

Some other “associated” links/articles/comments/posts that I came across:

My decision?

Continue reading

Network-less Ubuntu Server Install…

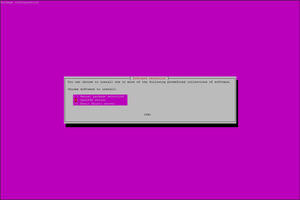
So, I tried to install Ubuntu Server 16.04.1 LTS while the machine was not plugged into the network, and also did not bother to connect to the WiFi network during the installation from the CD either…

Rusty from last Linux use (circa 2008), I was totally stuck thereafter – no network and no way to add anything else (through the network, because, you know, no network)… Fortunately, SSHd was selected during the installation – so all I had to do was to get the network up, then I could try and do every other thing remotely (well, that is the theory)…

2016-10-18_23-32-16

Just in case you really do not have an Internet connection (say, the Ubuntu distribution does not have your NIC drivers), you can then try any of the “offline” methods described here.

Documented, as follows, is my journey to “get unstuck” and continue the set-up…

Continue reading