No, I am not talking about the delivery kind…
With an existing PROLiNK 902S 2000VA online UPS providing clean power to my (aging) desktop, I thought it time to finally get a proper UPS for my NAS instead of the old, line-interactive PROLiNK PRO1200SVU that already had to have its dying battery replaced once.
Fortunately, I managed to get a PROLiNK 903S 3000VA unit.
Like the 902S and my desktop, the 903S has its USB cable plugged directly into a/the computer, in the hope of using the provided ViewPower software to monitor the UPS and cleanly and safely shutdown the host should power interruptions occur.
Unfortunately, installation was not at all simple, particularly not since the user manual has no mention of installing the software on Linux (even if the software is “compatible” with Linux, being Java-based).
Googling did not help much, with most/all the returned pages referencing the use of NUTS instead of the intended/provided ViewPower, not to mention needing to “hack” your own “configuration file”, with no guarantee that the runtime calculations are correct.
After much fumbling around, searching and testing, I managed to get it to work…
Detecting the Hardware
Initially, I was wondering what Ubuntu viewed the UPS (via USB) as; lsusb sorted that out quickly enough:
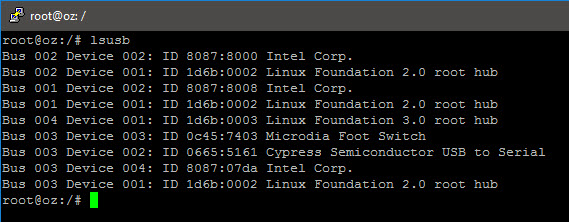
The UPS appears to the machine as a “serial port”…
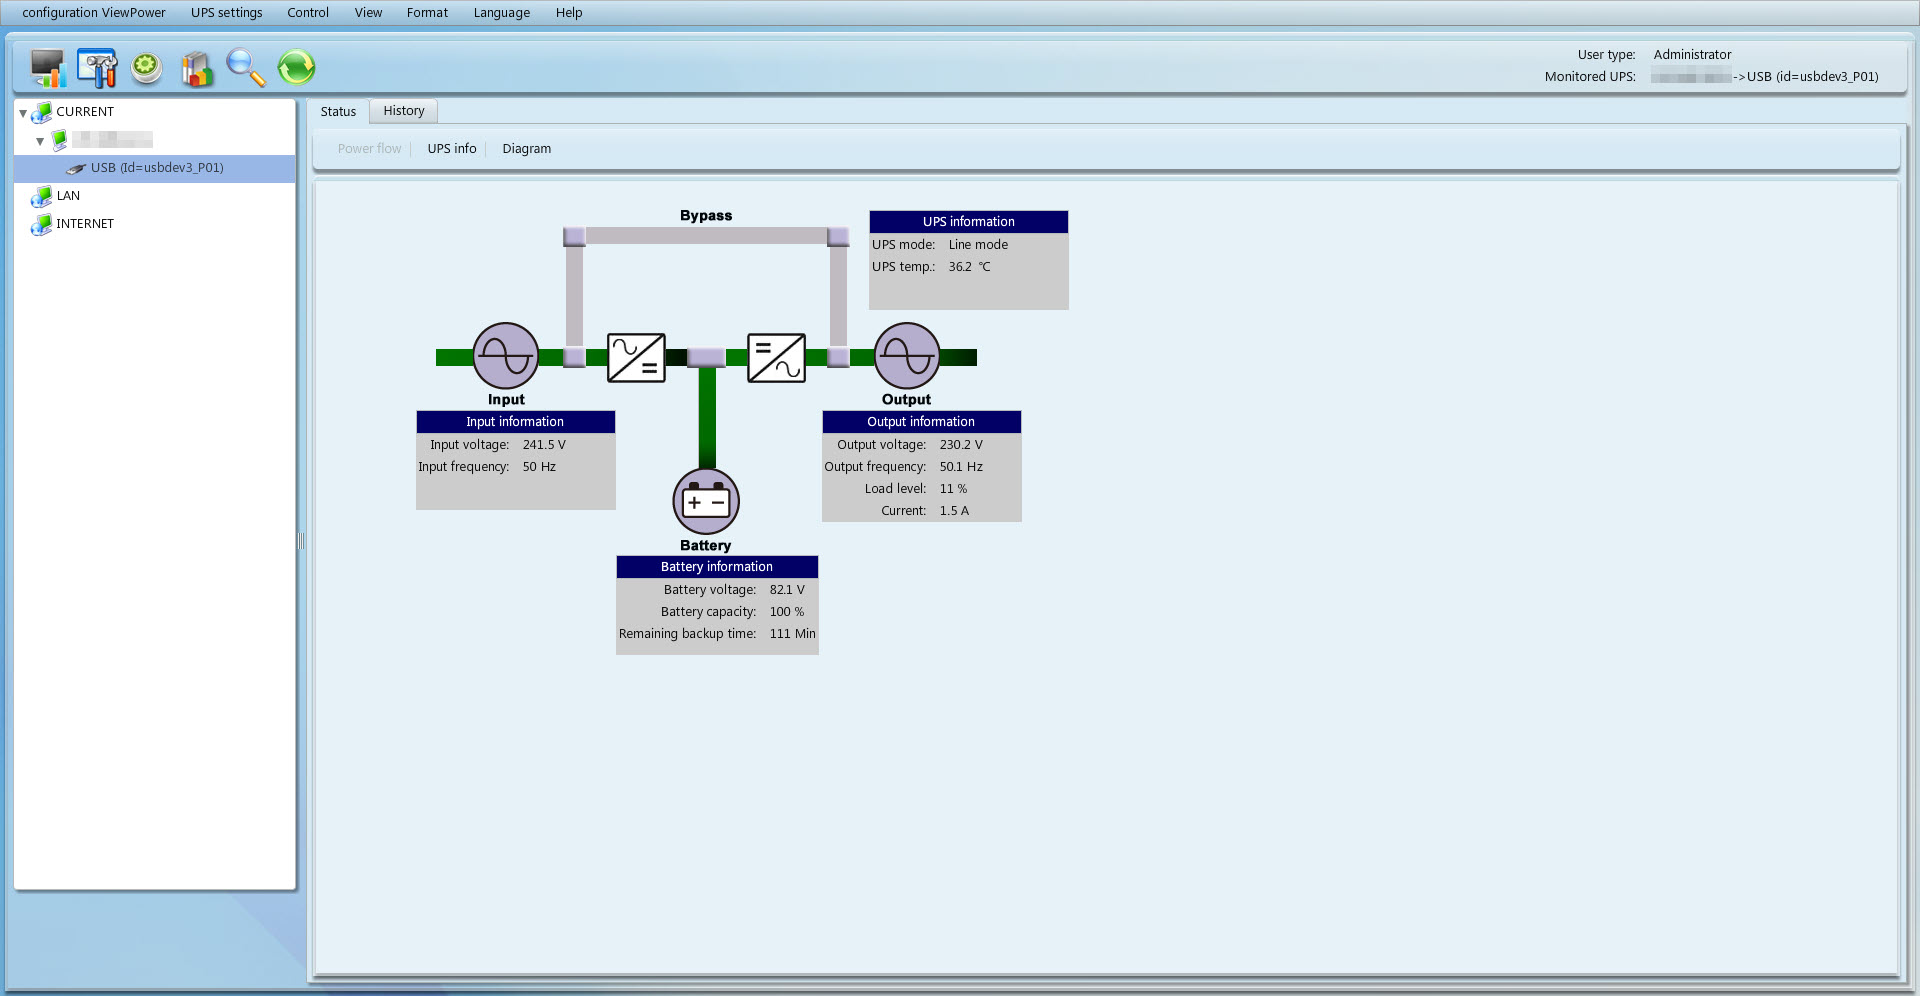
ViewPower Software
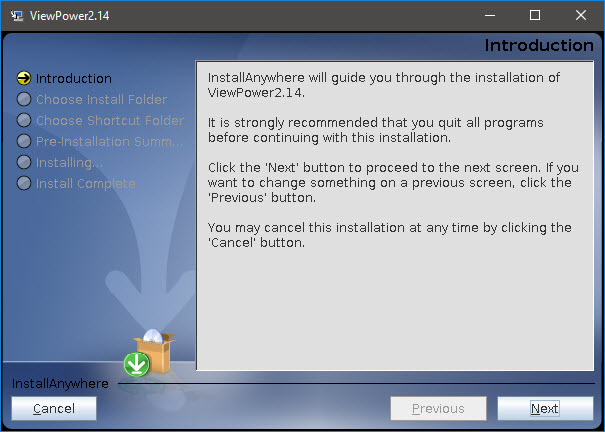
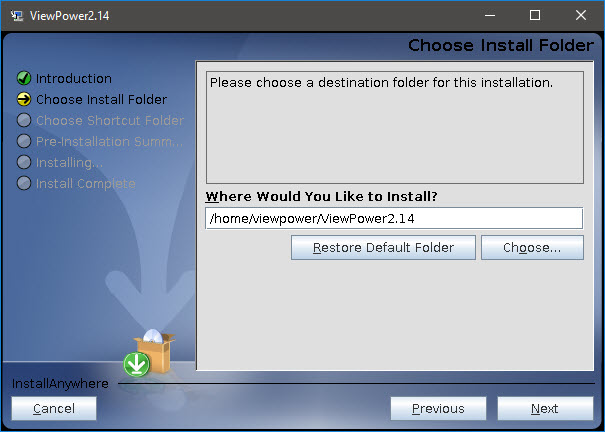
So, first challenge: installing the software…
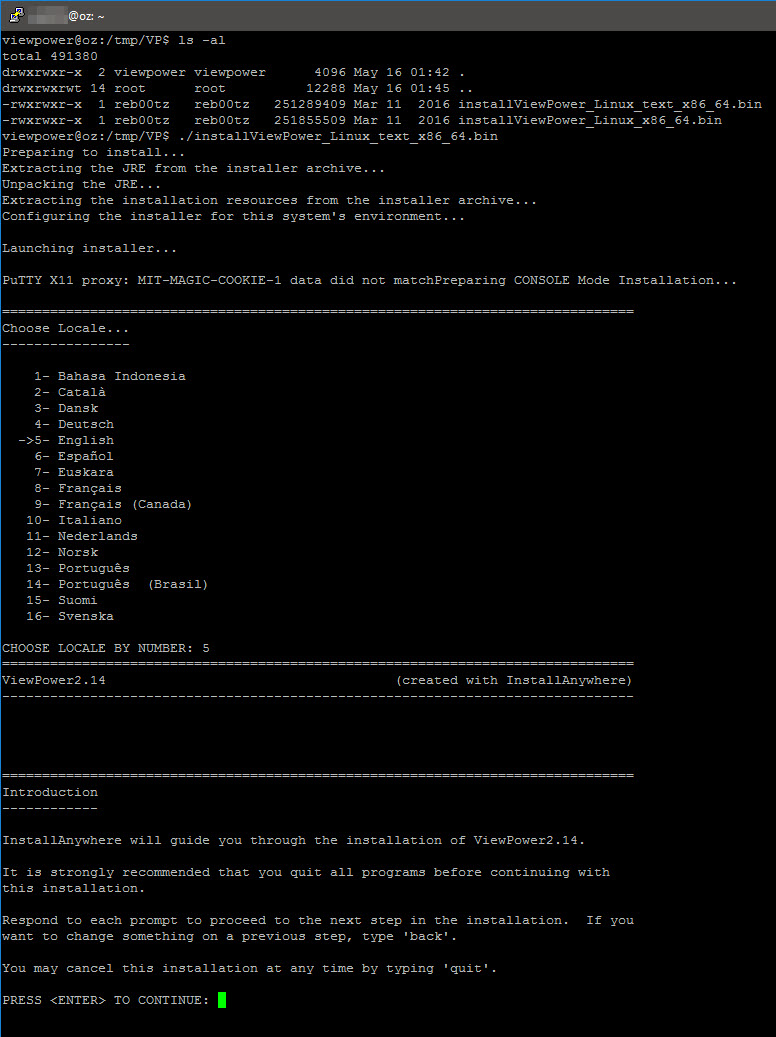
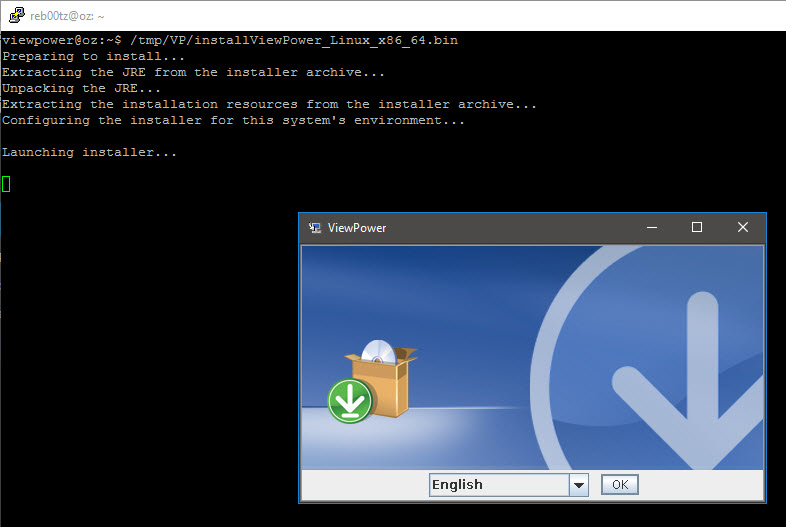
Having downloaded the software, I realised that the software is an InstallAnywhere binary package. Attempting to run it with X Windows will provide a GUI; otherwise, it will use a console prompt/text interactive installation.
First up, as su (or else prefix all commands except the last with “sudo“), I created a separate system user and group, reset the password, then log in as the newly minted user:
useradd --system --user-group viewpower
passwd viewpower
su -l viewpower
We then proceed to run the installer (in my case, I had tar -zxcf‘d the file to /tmp/VP):
/tmp/VP/installViewPower_Linux_text_x86_64.bin
/tmp/VP/installViewPower_Linux_x86_64.bin
To secure the system, I then disabled the viewpower user:
passwd -l viewpower
usermod -s /bin/false viewpower
Making It Work
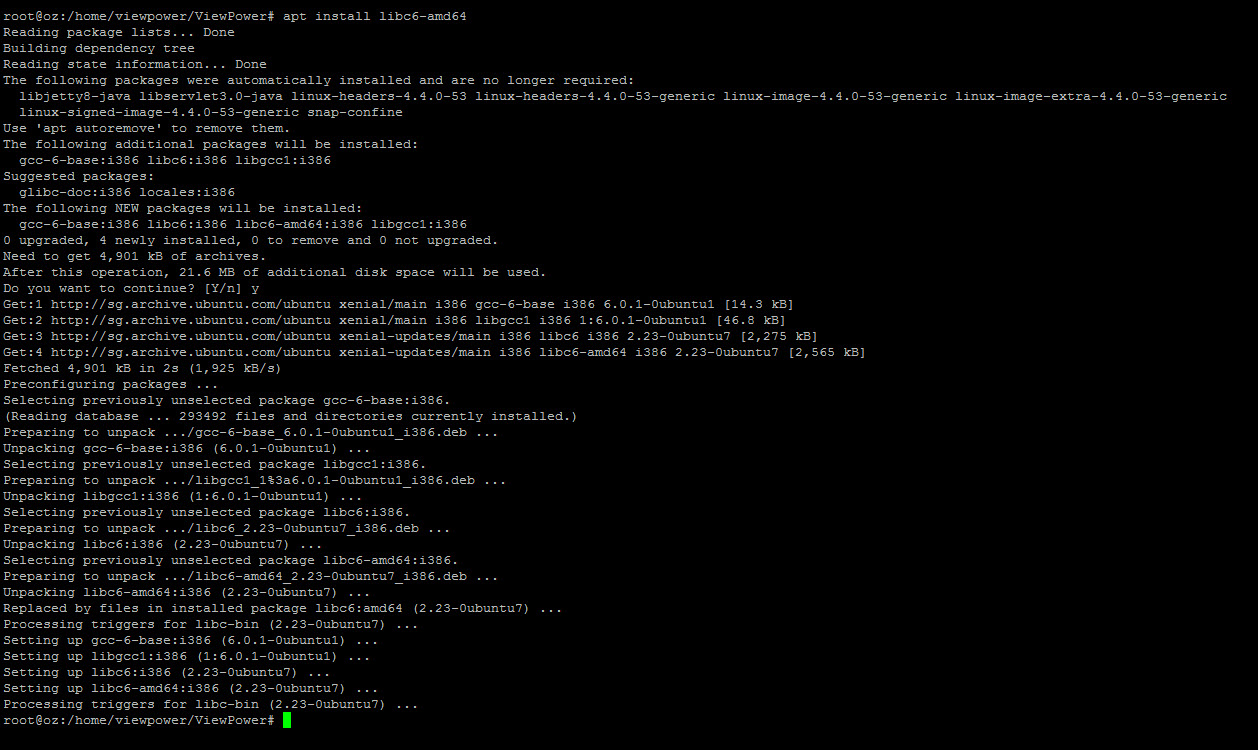
It is one thing to get it installed, it was another to get it working… Attempting to run ViewPower from the installation directory would immediately give me a “missing libc6.so error“. Let me save you some time: do not attempt to “hardcode” this by creating a link (as per the advice you may run across on the web) – it might break compatibility with other software.
After some more searching, I realised that the software was “hardcoded” to look for the 32-bit version of the libc6.so library which my Ubuntu LTS 16.04 64-bit install did not have by default.
Installing it (via apt install libc6-amd64) resolved the issue immediately.
Daemonising It
So, there appears to be an autorun.sh script, as well as a upsMonitoring script (that calls StartMain and StopMain scripts). The short version is this:
- the installer makes no effort whatsoever to daemonise the monitoring software for you
- the software is not made to adhere to the LSB standards, meaning that the
upsMonitoringscript cannot be used in Ubuntu’s/etc/init.dwithout modifications - the upsMonitoring script is not written properly to correctly return status codes (and has some spelling errors)
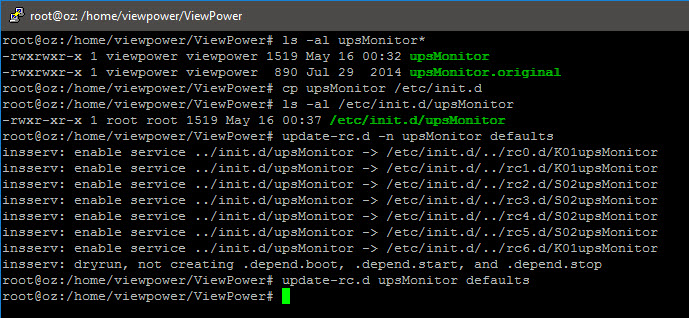
In short, I did the hard work and modified it so that you may simply:
- drop this version of
upsMonitorinto/etc/init.d - run
sudo update-rc.d upsMonitor defaults - run
systemctl daemon-reload
You may then try to start, stop and/or restart the upsMonitor service with systemctl.
For those that want to know what changes were made in the upsMonitoring script, all modifications are highlighted in red:
#!/bin/sh
#
#chkconfig:35 99 1
#
#description: upsMonitor service
#

### BEGIN INIT INFO
# Provides:          upsMonitor
# Required-Start:    $local_fs $remote_fs $network $syslog
# Required-Stop:     $local_fs $remote_fs $network $syslog
# Should-Start:
# Should-Stop:
# X-Start-Before:
# X-Stop-After:
# Default-Start:     2 3 4 5
# Default-Stop:      0 1 6
# X-Interactive:
# Short-Description: Initialisation script to start ViewPower UPS monitor
# Description:       This file should be placed in /etc/init.d, then run
#                    sudo update-rc.d upsMonitor defaults
#                    to run update the rc.d start and stop scripts.
### END INIT INFO

MONITOR_HOME=/home/viewpower/ViewPower

UPS_PORT=15178

RETVAL=0

SERV_PATH=/etc/init.d
#chmod +x $SERV_PATH/upsMonitor

pids=$(netstat -lnp | grep $UPS_PORT | awk '{print $7}')
pids=${pids%/*}

case $1 in

    start)
        if [ -n "$pids" ]; then
            echo "upsMonitor service already start"
            RETVAL=1
        else
            cd $MONITOR_HOME
            ./StartMain &
            echo "starting upsMonitor service"
        fi
        exit $RETVAL
    ;;

    stop)
        if [ -n "$pids" ]; then
            echo "stopping upsMonitor service"
            cd $MONITOR_HOME
            ./StopMain &
        else
            echo "upsMonitor service already stopped"
            RETVAL=1
        fi
        exit $RETVAL
    ;;

    restart)
        cd $MONITOR_HOME
        ./StopMain &
        sleep 5
        cd $MONITOR_HOME
        ./StartMain &
        exit $RETVAL
    ;;

    status)
        if [ -n "$pids" ]; then
            echo "upsMonitor is running"
        else
            echo "upsMonitor is not running"
        fi
        exit $RETVAL
    ;;

*)
    echo "Usage:$0{start|stop|restart}"
    exit 1
esac
Testing
Finally, having confirmed the service is starting correctly (via systemctl status upsMonitoring); I managed to connect to the ViewPower UPS monitoring daemon remotely (http://server_IP_address:15178/ViewPower).