With two NICs available on my motherboard (one Intel I217V and one Atheros AR8161B), whereas the product specifications warns that “teaming is not supported”, I am aware that any capable network stack would be able to handle teaming via software (disregarding drivers and assuming certain hardware acceleration features like TCP offloading is disabled).
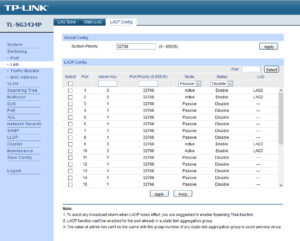
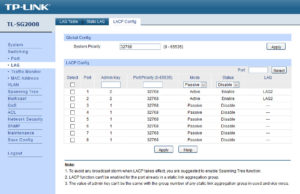
Of course, proper LACP/802.13ad (bonding mode #4) set up requires upstream networking equipment support (i.e. your network switch also requires such support). Fortunately, I happen to have a TP-Link TL-SG3424P managed switch which does support this. Obviously, this is overkill, but I highly recommend the TP-Link TL-SG2008 if 8 ports are sufficient. As I had the chance to run multiple Cat6 cable runs from the closet/store to the various rooms in my apartment when it was renovated, I could, and do, use a SG2008s as a trunk port in my study which is link-aggregated to the SG3424P.
Network Manager
Some instructions on the big, bad Internet mentioned using the Network Manager from the desktop. All that did was to mess up the settings.
- https://help.ubuntu.com/community/NetworkManager
- https://access.redhat.com/documentation/en-US/Red_Hat_Enterprise_Linux/6/html/Deployment_Guide/sec-Establishing_a_Bond_Connection.html
Fortunately, I had backups of the /etc/network/interfaces file which I could revert the damage the Network Manager did. So, I finally did the sane thing and just disabled the Network Manager:
If You Want Something Done Right, You Have To Do It Yourself…
So, we come back to the good ol’ shell…
Some more failed attempts:
- http://www.cyberciti.biz/faq/ubuntu-linux-bridging-and-bonding-setup/
- http://unix.stackexchange.com/questions/128439/good-detailed-explanation-of-etc-network-interfaces-syntax
However, my search ended with the (near) working instructions (refer to the last comment).
This finally brought me to a working solution; what follows is my final /etc/network/interfaces file:
# This file describes the network interfaces available on your system
# and how to activate them. For more information, see interfaces(5).

source /etc/network/interfaces.d/*

# The loopback network interface
auto lo
iface lo inet loopback

# Intel Wireless N 2230
#allow wlp4s0
#iface wlp4s0 inet dhcp
#pre-up /etc/init.d/wpa.sh start
#pre-down /etc/init.d/wpa.sh stop

##############################################
# Channel bonding eno1 and enp3s0 interfaces #
##############################################

# set up bond0
auto bond0
iface bond0 inet dhcp
        hwaddress <MAC address of the "primary" NIC>
        pre-up modprobe bonding mode=802.3ad miimon=100 xmit_hash_policy=layer2+3 lacp-rate=fast
        pre-up ifconfig bond0 up
        pre-up ip link set eno1 master bond0
        pre-up ip link set enp3s0 master bond0
        up /bin/true
        down /bin/true
        post-down ip link set eno1 nomaster
        post-down ip link set enp3s0 nomaster
        post-down ifconfig bond0 down
        post-down rmmod bonding
I realise that I am effectively “hacking” the if-up and if-down scripts, but the truth is that I am unaware why this works (versus the 2nd article linked above). Please feel free to drop a line if anyone can explain why and what the differences are.
2016/12/23 Update: Having to create a bridged network interface for the purposes of linking a KVM virtual switch, I had to make further updates to the configuration. Check out the changes here.


