So, some three years after the site launch, we have used plenty of products, but with kids, family and work, little time to write about it…
Nevertheless, I had been experimenting with ANTLR4 for about over half a year now. I had initial issues setting it up due to the somewhat out-dated instructions available then. When I was “forced” to upgrade to Windows 10 and re-installed everything from scratch, I realised I had totally forgotten what the steps were to get ANTLR4 working with Visual Studio 2015…
Hence, in an effort to help others and as a reference to self, please find a step-by-step guide to using ANTLR4 (version 4.3.0 stable) with Visual Studio 2015 (Community Edition) (although the instructions should work for other VS editions as well).
Main Points
- a JRE needs to be on the executable search path (i.e. the absolute path is in the %PATH% environment variable)
- installation of the ANTLR4 packages is via the NuGet Package Manager
- grammar file(s)’ compilation options need(s) to be customised manually by editing the project’s configuration file (*.csproj)
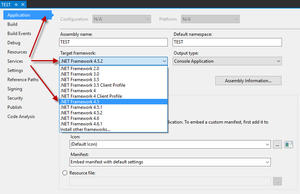
- the latest stable version of ANTLR4 (version 4.3.0) is only supported on .NET Framework 4.5 and below, therefore there is a need to change the target framework from the default (if the default version is higher)
- references to the ANTLR namespaces are required
Detailed Steps
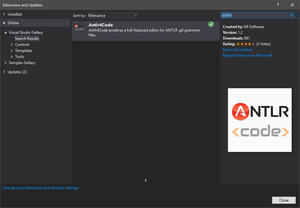
- install a Java Runtime Environment (JRE) (whereas I am aware that later versions of ANTLR includes an IKVM, I prefer to use the “standard” JVM)
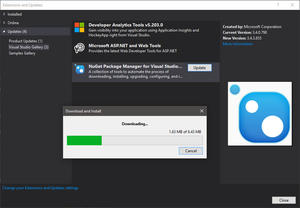
- assuming VS is installed, ensure that you have the latest NuGet Package Manager first:
- open or create a new project/solution, then start adding the ANTLR4 NuGet packages:
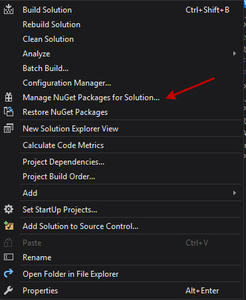
- in the Solution Explorer window, right-click on the solution and select “Manage NuGet Packages for Solution…” to quickly add ANTLR4 packages across multiple projects:
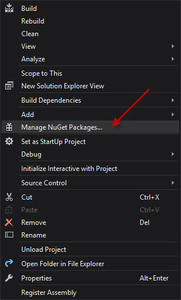
- or, in the Solution Explorer window, right-click on a project and select “Manage NuGet Packages…” to add ANTLR4 packages to that specific project:
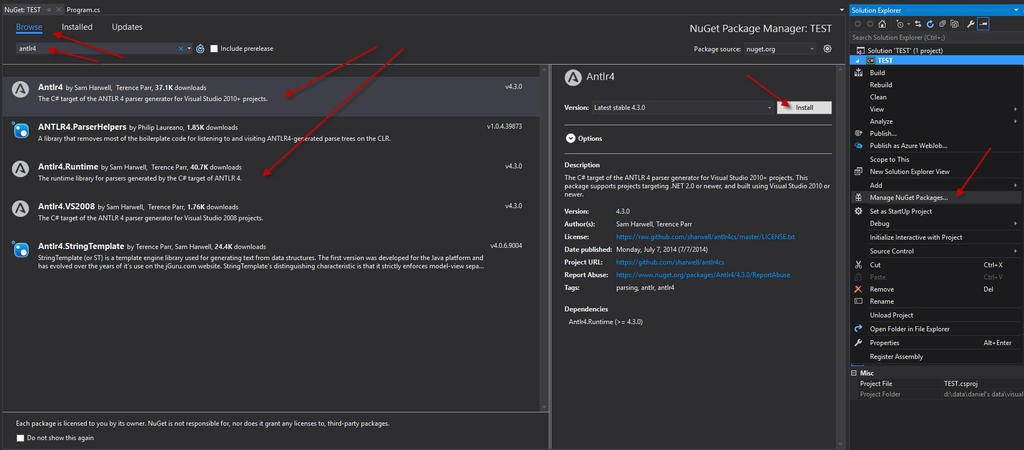
- browse/search for “antlr” and then select and install the “Antlr4” and “Antlr4.Runtime” packages:
- in the Solution Explorer window, right-click on the solution and select “Manage NuGet Packages for Solution…” to quickly add ANTLR4 packages across multiple projects:
- create or add your grammar file (*.g4):
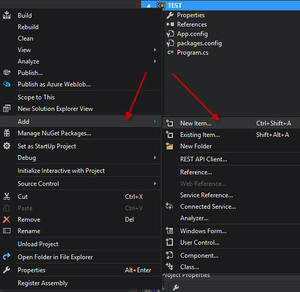
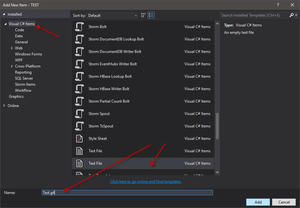
- assuming creation from scratch, right-click on the project (which has the ANTLR4 packages) and select “New Item…”:
- select “Text File” and give it a name with a “.g4” extension:
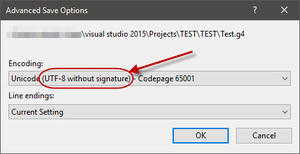
- the file will be opened in the editor, save it as a UTF-8 without BOM encoded file by selecting “File” > “Advanced Save Options…” and selecting the correct encoding accordingly:
- assuming creation from scratch, right-click on the project (which has the ANTLR4 packages) and select “New Item…”:
- configure the necessary customised options to compile your grammar (*.g4) file(s):
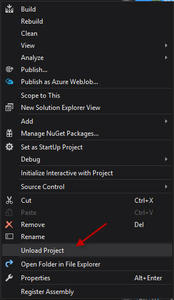
- in the Solution Explorer window, right-click on the project containing the grammar file(s) and select “Unload Project”:
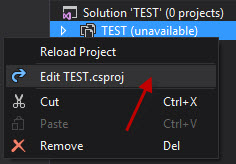
- right-click on the unloaded project again and select “Edit <project name>.csproj” to edit the project configuration file directly:
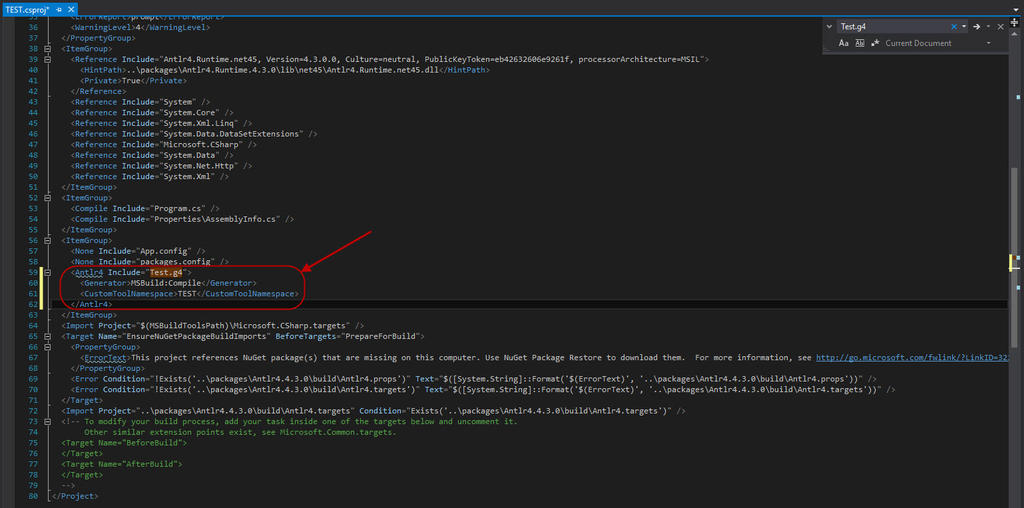
- with the project configuration file open, search for each of the grammar files’ names to find the XML node configuration snippet:
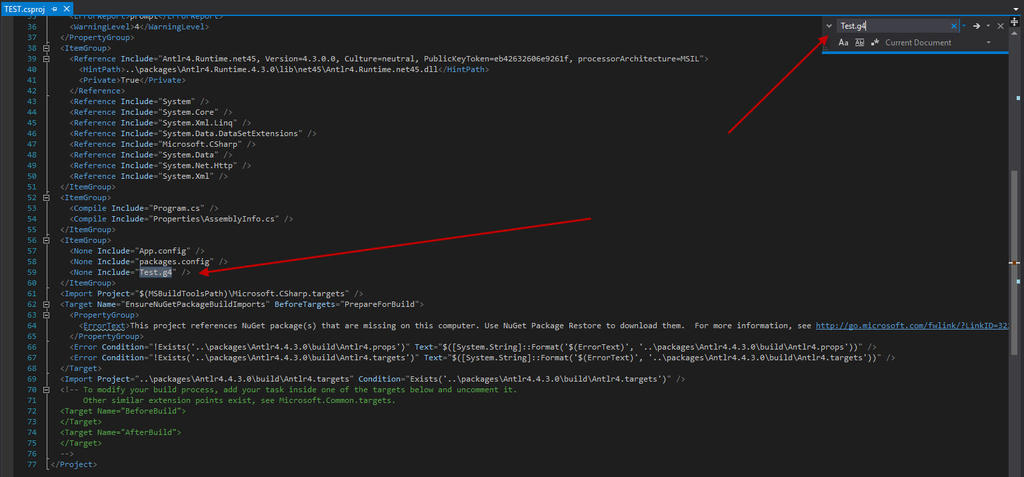
- replace the XML node with the following snippet, replacing the portions highlighted in red accordingly:
<Antlr4 Include="<grammar file name>.g4">
            <Generator>MSBuild:Compile</Generator>
            <CustomToolNamespace><project namespace></CustomToolNamespace>
</Antlr4>
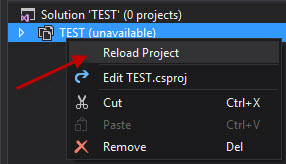
- save the configuration file, and in the Solution Explorer window, right-click on the unloaded project and select “Reload Project”:
- in the Solution Explorer window, right-click on the project containing the grammar file(s) and select “Unload Project”:
- change the project’s target framework version:
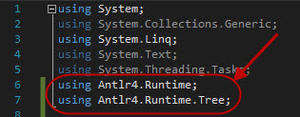
- finally, ensure to reference the appropriate ANTLR namespaces (“Antlr4.Runtime” and “Antlr4.Runtime.Tree” and any others as necessary) in your code:
A big “Thank You” to the creator of ANTLR and all its contributors!
– Daniel
